Setup Guide
Apple Wallet (iPhone)
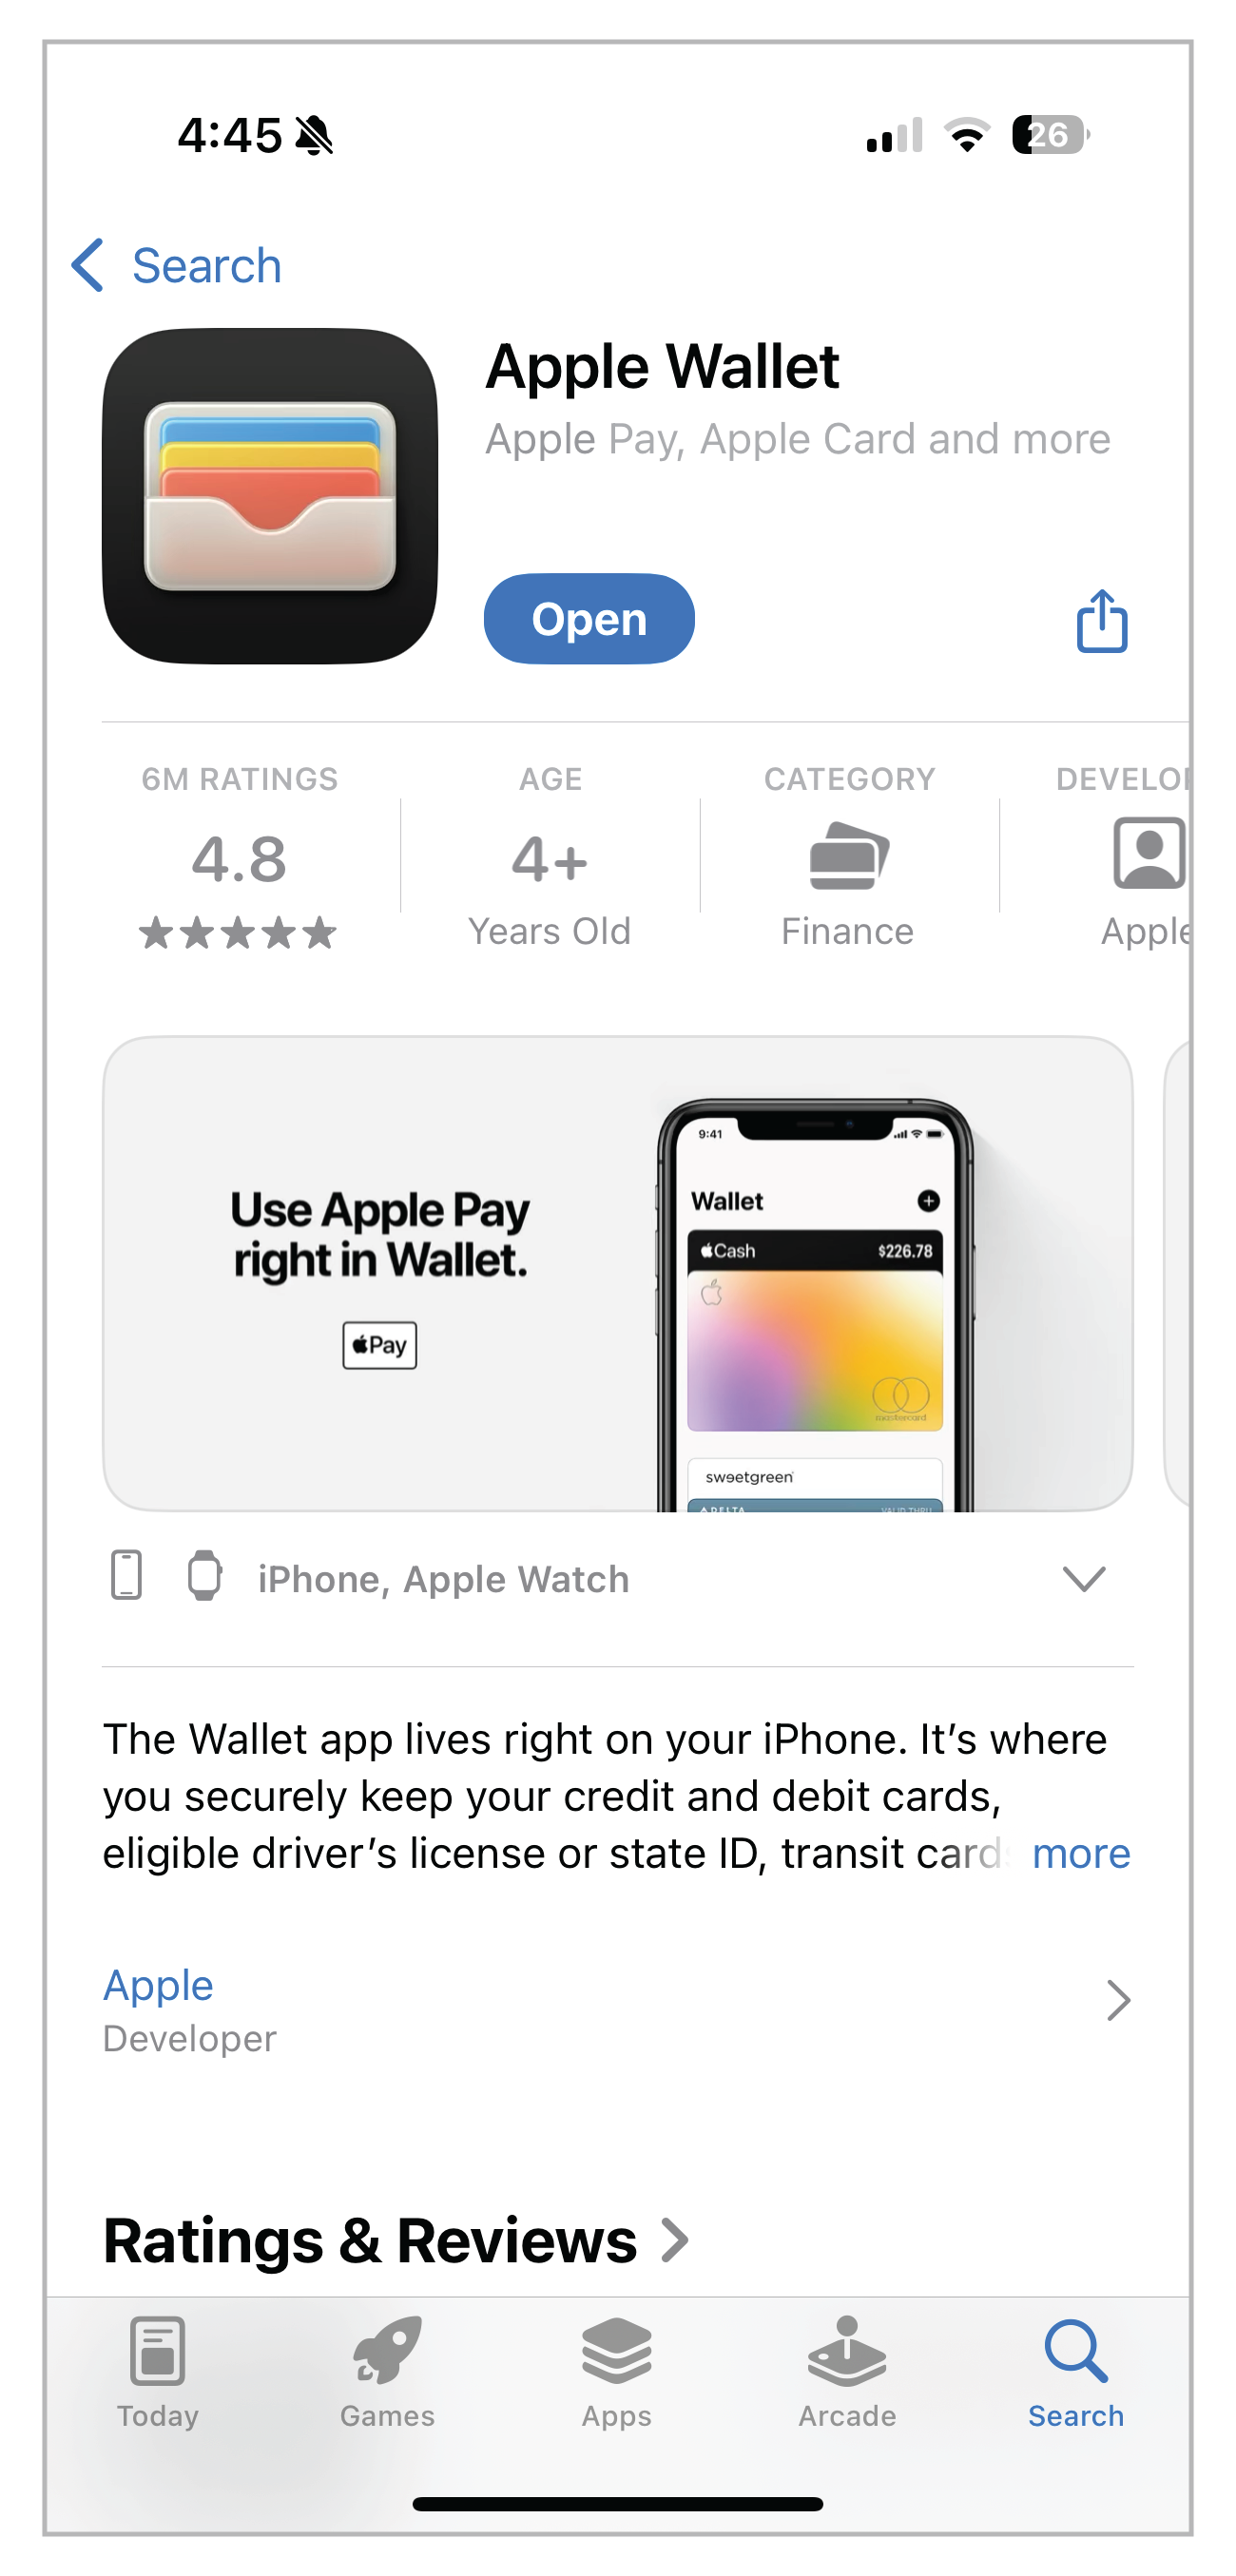
1. Download Apple Wallet from the App Store (if you don’t already have Wallet)
Open the App Store.
Tap Search and type Wallet.
The official app is called Wallet (by Apple). Tap Get / Open to install.
When installed, the Wallet icon looks like a small, black, rounded square with stacked cards.
Tip: Most newer iPhones include Wallet pre-installed. If you can’t find the App Store entry, open your device and search the home screen for “Wallet”.
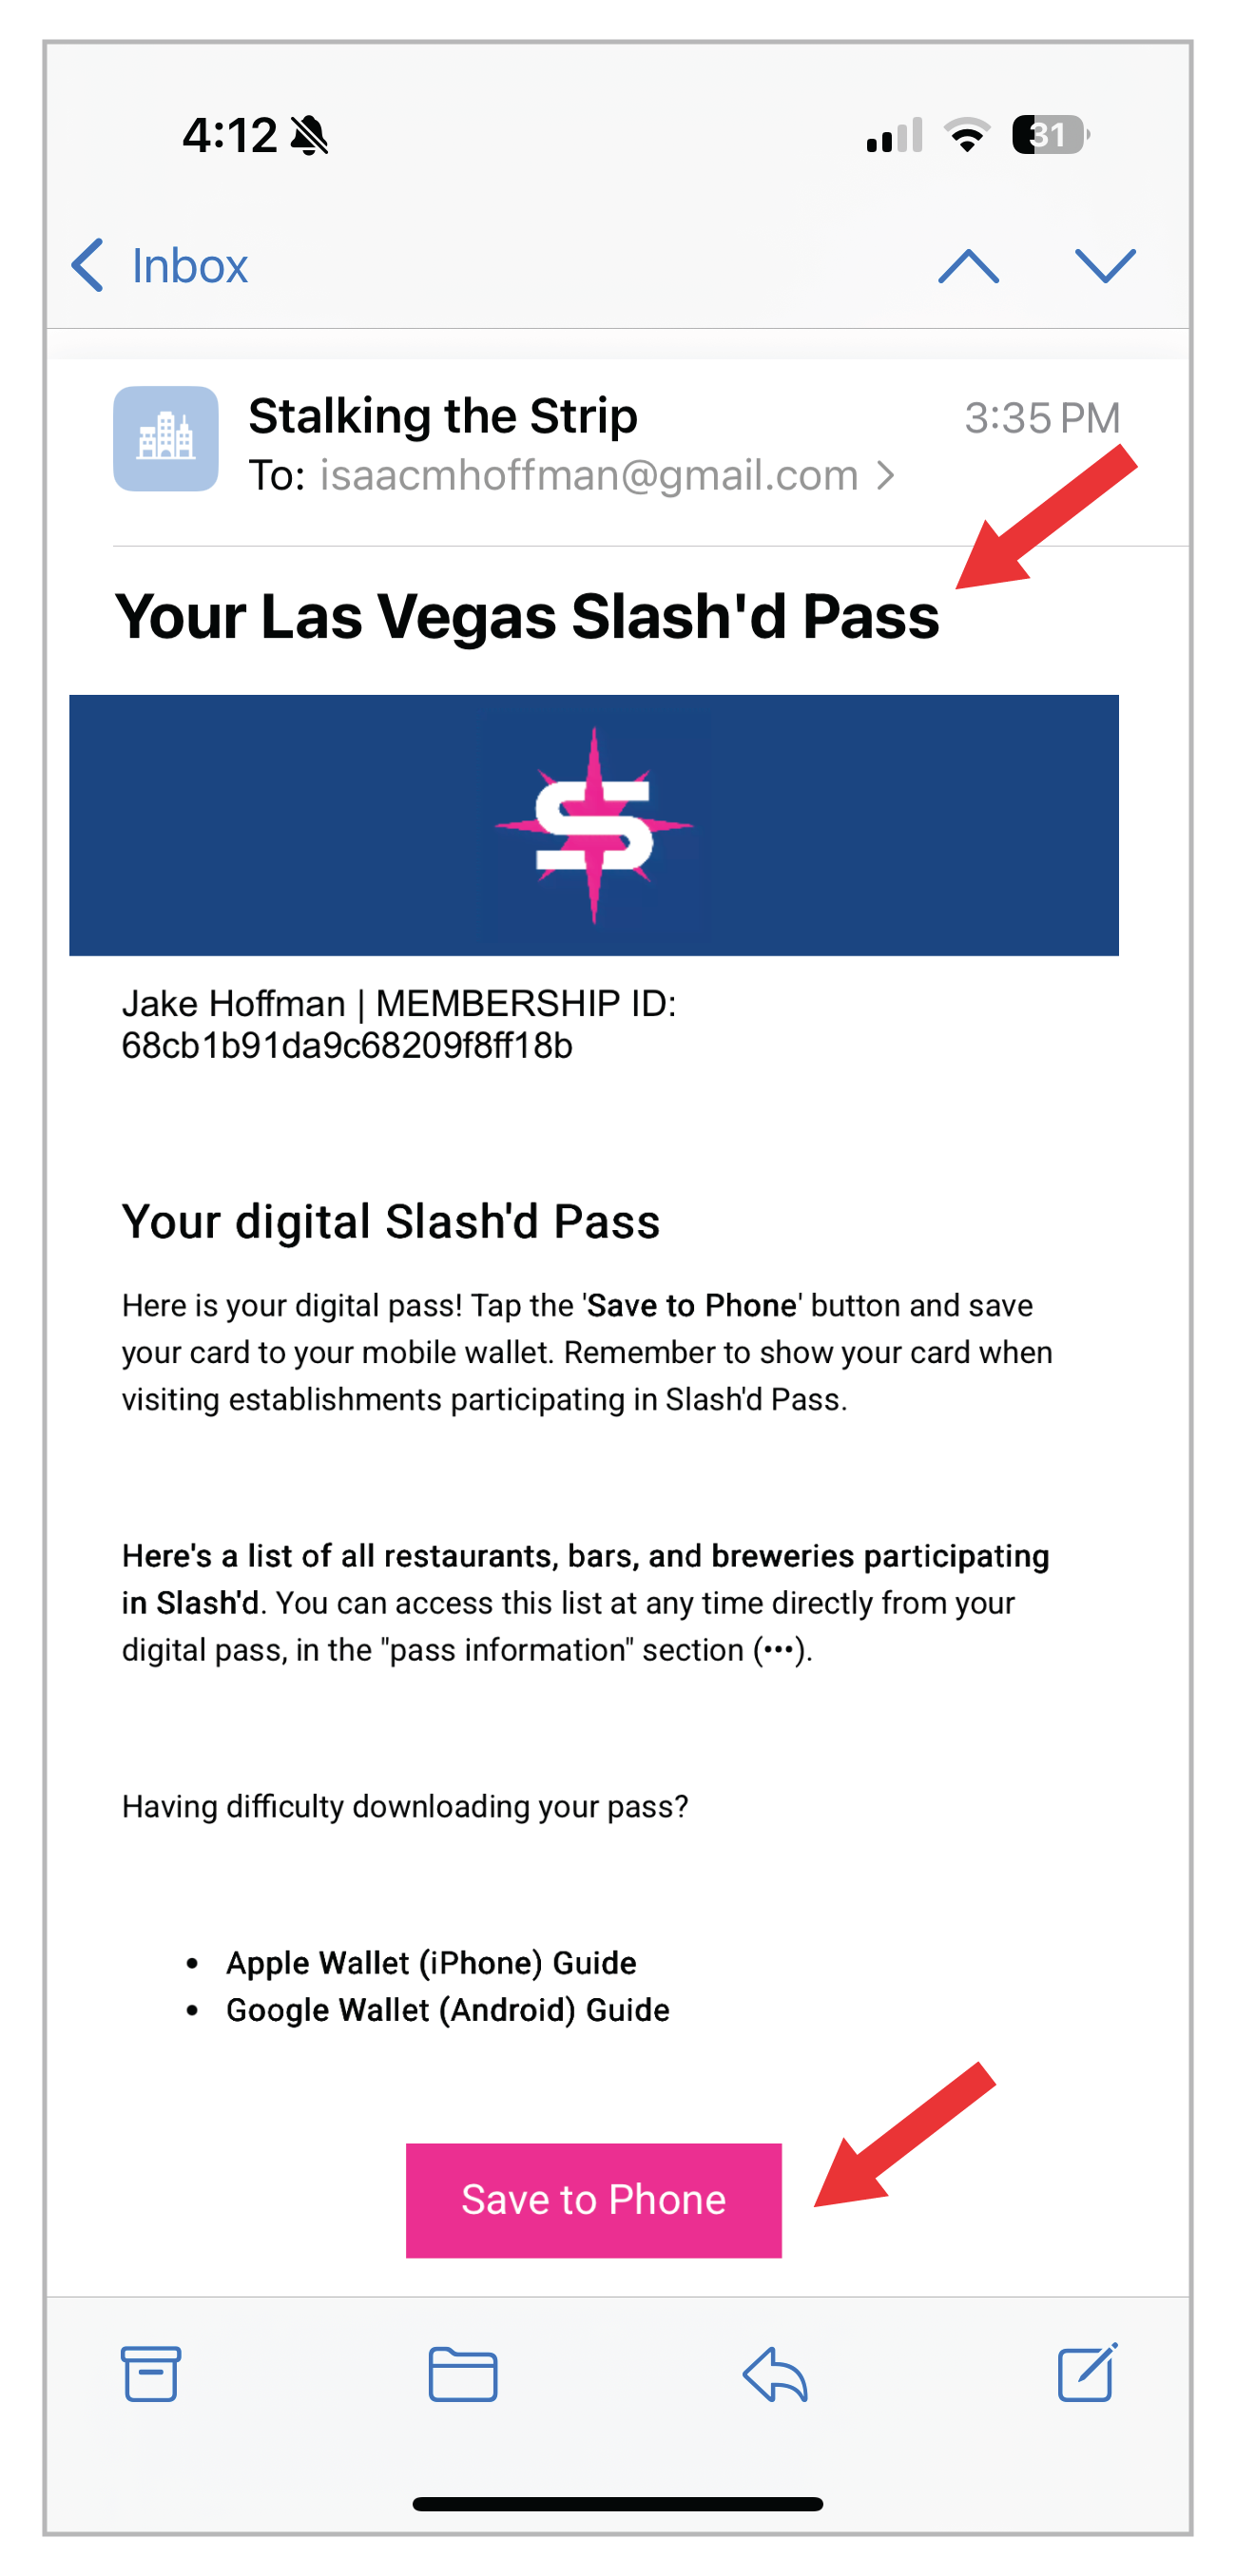
2. Locate the “Slash’d” email and open the pass
You will receive two emails post-purchase:
An order confirmation from Stalking the Strip (save for your records)
“Your Las Vegas Slash’d Pass” from Stalking the Strip
Open the email you received titled “Your Las Vegas Slash Pass.” Use the device’s default Mail app or Gmail app — both will work.
In the email, you will see a “Save to Phone” button.
If clicked from the Gmail app, open the pass with Safari.
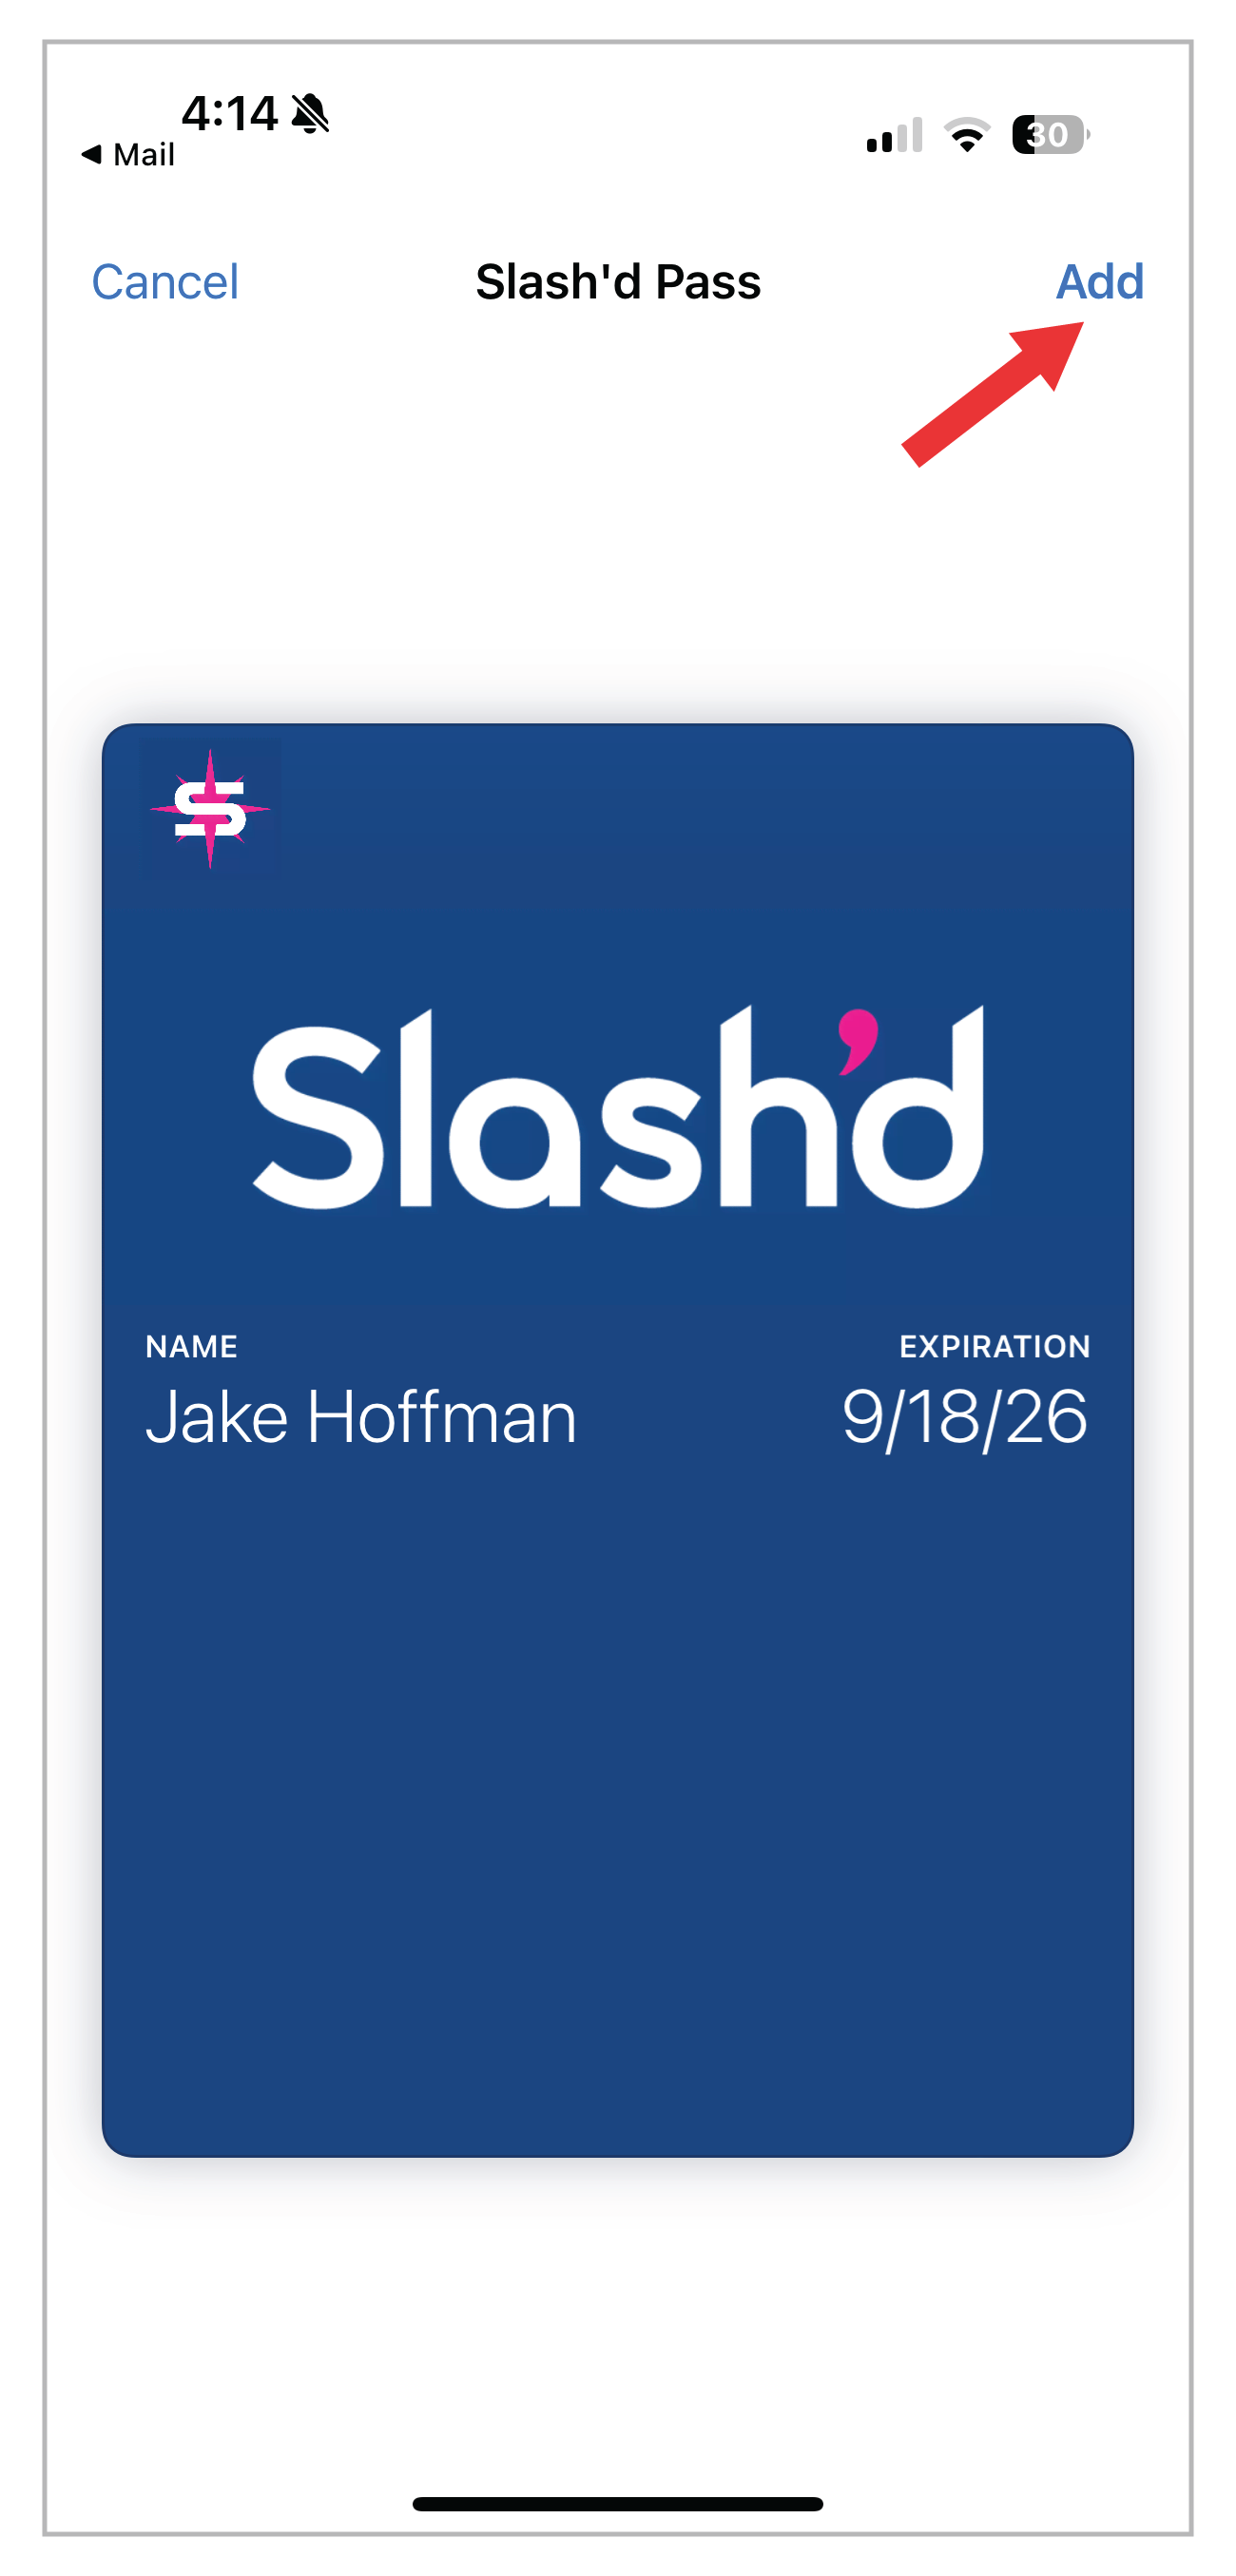
3. Add the pass to Wallet
The pass will open a preview in Wallet showing the pass front and details. On that screen, tap Add (upper-right) then Done.
4. Confirm & pin (optional)
Open the Apple Wallet app and find your Slash’d Pass.
To make it easy to find, you can tap the three-dot (•••) or i to open pass settings and enable notifications or Add to Favorites (if available).

Troubleshooting — Common iOS issues
Button not showing: Try opening the email in Safari (i.e., tap the link in the email and choose “Open in Safari”). Some email clients strip special buttons.
The ‘Add’ button is grayed out: check that your iPhone is running a reasonably recent iOS version. Also, ensure there’s no VPN or content filtering that blocks the pass endpoint.
Pass looks incorrect or doesn’t update: go to Wallet → select the pass → pull down to refresh. If that fails, reply to Slash’d support and attach a screenshot.